Replacing the Battery Control Module (BCM)
I’ve been doing a lot of work on the Banana recently, but haven’t really had time to write it up. Now that those projects are heading toward completion, I hope to post about what I did, why I did it, and how it went.
It had been nearly a year without any major issues when I ran into a big one. I recently bought a new tractor and it turns out the salesperson, who also delivered it to us, is a big Mercedes fan and is looking to by one of their sport coupes. I offered to let him drive mine, and right after we hopped in and started it up, I went to drop the top and ended up getting a shower of hydraulic fluid.
I was kind of depressed. I had gotten the car about two projects away from being “done”. I mean, I have a couple of other “improvements” I have thought about, such as new rims and painting the brake calipers, but by “done” I meant getting the car to the point where all I really need to do is drive it and occasionally detail it.
I’ll talk about the cylinder repair in a later post, but while I had the car apart in order to fix it, I took the time to address another issue: replacing the battery control module, or BCM.
I lurk on a website called BenzWorld, and there was a post by a person looking to buy an R230. In it he brought up replacing the BCM. While I had never really heard about it being a problem, I learned bad BCMs can cause a fire that will total the car.
Here is a video that goes into depth about BCM fires.
This guy seems to know what he is talking about, but I do have to disagree with his comment to never trickle charge the consumer battery without disconnecting it. I use a CTEK charger that is set for AGM batteries and it works fine. Unless you drive your R230 almost daily, the vampire drain on that battery means you’ll have to wait ten minutes or so to put the top down, among other things, while the car tells you that the consumer battery is offline.
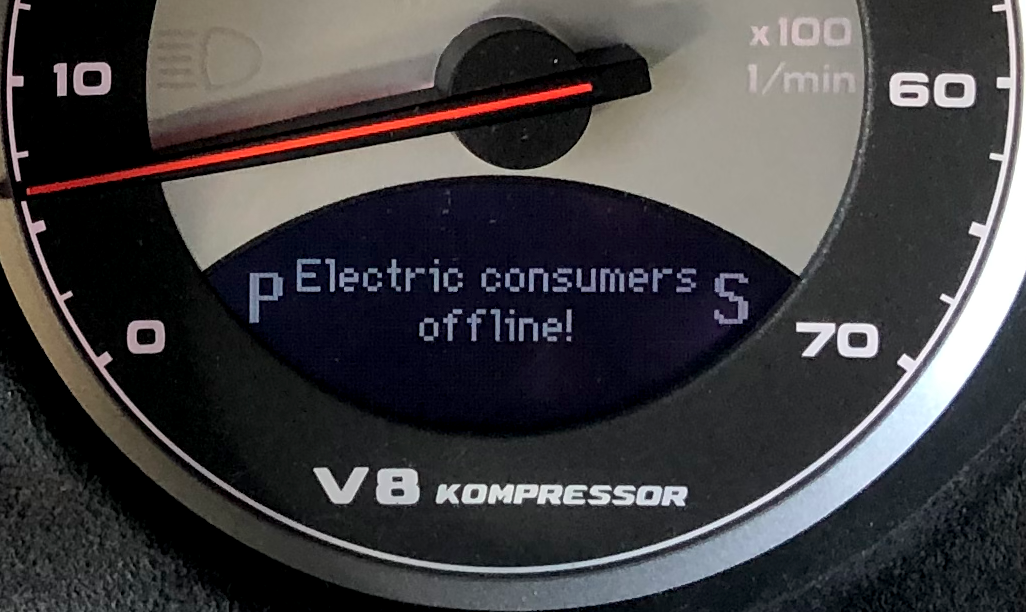
Anyway, when it comes to preventing fires you have a couple of options. The BCM is hard to get to as you have to take out half of the trim in the trunk, so some people have installed a little 3D printed cover that you can remove to make it easier check on the status of your unit. Checking it regularly should enable you to prevent it from getting to the point where it catches on fire.
Another option is to install a 30A fuse inline with the module, so if it does fault and starts drawing a lot of current, the fuse will blow before the unit catches fire.
The best solution seems to be to replace the BCM entirely with an aftermarket unit. Many people I see on the forums opted to buy one from a man named Brian Wallace who runs a group on Facebook.
I’m not on Facebook for privacy reasons, but I decided to bite the bullet and set up a throwaway account in order to obtain one of these units, but for some reason Facebook banned my account for violating its terms of service - before I even had an account. That must be a new record.
While I can’t confirm this (since I’m not on Facebook), I’ve been told that Brian’s units are solid but that the lead time is many months, and up to a year. Now that I was fixated on my one-of-a-kind Mercedes catching fire, I was motivated to do something about it sooner rather than later.
I ended up finding a company called Everdrive Parts that builds an aftermarket BCM replacement. I researched them and saw nothing but positive reviews, so I decided to pull the trigger and order. They are based in the Netherlands so I knew it was probably going to take several weeks, but I figured it would be faster than trying to deal with Brian through Facebook if I could even make that happen.
After I placed my order, I soon received an email from Richard telling me about the process. There is a four week lead time for building the unit, plus shipping time. He was real engaging, and I started to relax about my choice to use his company.
The order shipped a month later, but it sat in customs on the US side for another week. When I opened the box I could tell the unit was well-made, and Richard had thrown in, at my suggestion, a small pack of stroopwafles.

If you have never had a stroopwafle, you are missing out. This is a Dutch treat made of caramel sandwiched between two thin “waffle” cookies. I love them and when I joked that he should send me some with the unit, he liked the idea so much it is now a policy for all orders.
You are welcome.
Anyway, I didn’t really have time to replace the BCM until the aforementioned cylinder leak had me tearing into the car. Replacing the BCM is easy, five minutes tops, but getting to it is a pain.
There are a number of videos on YouTube on replacing the BCM, and I used this one to figure out how to remove all of the stuff in the trunk to get to the unit.
Now one thing that video doesn’t show is putting the truck lid into “service mode”. It probably isn’t necessary but I needed to do it for the cylinder repair so I went ahead and left it up.
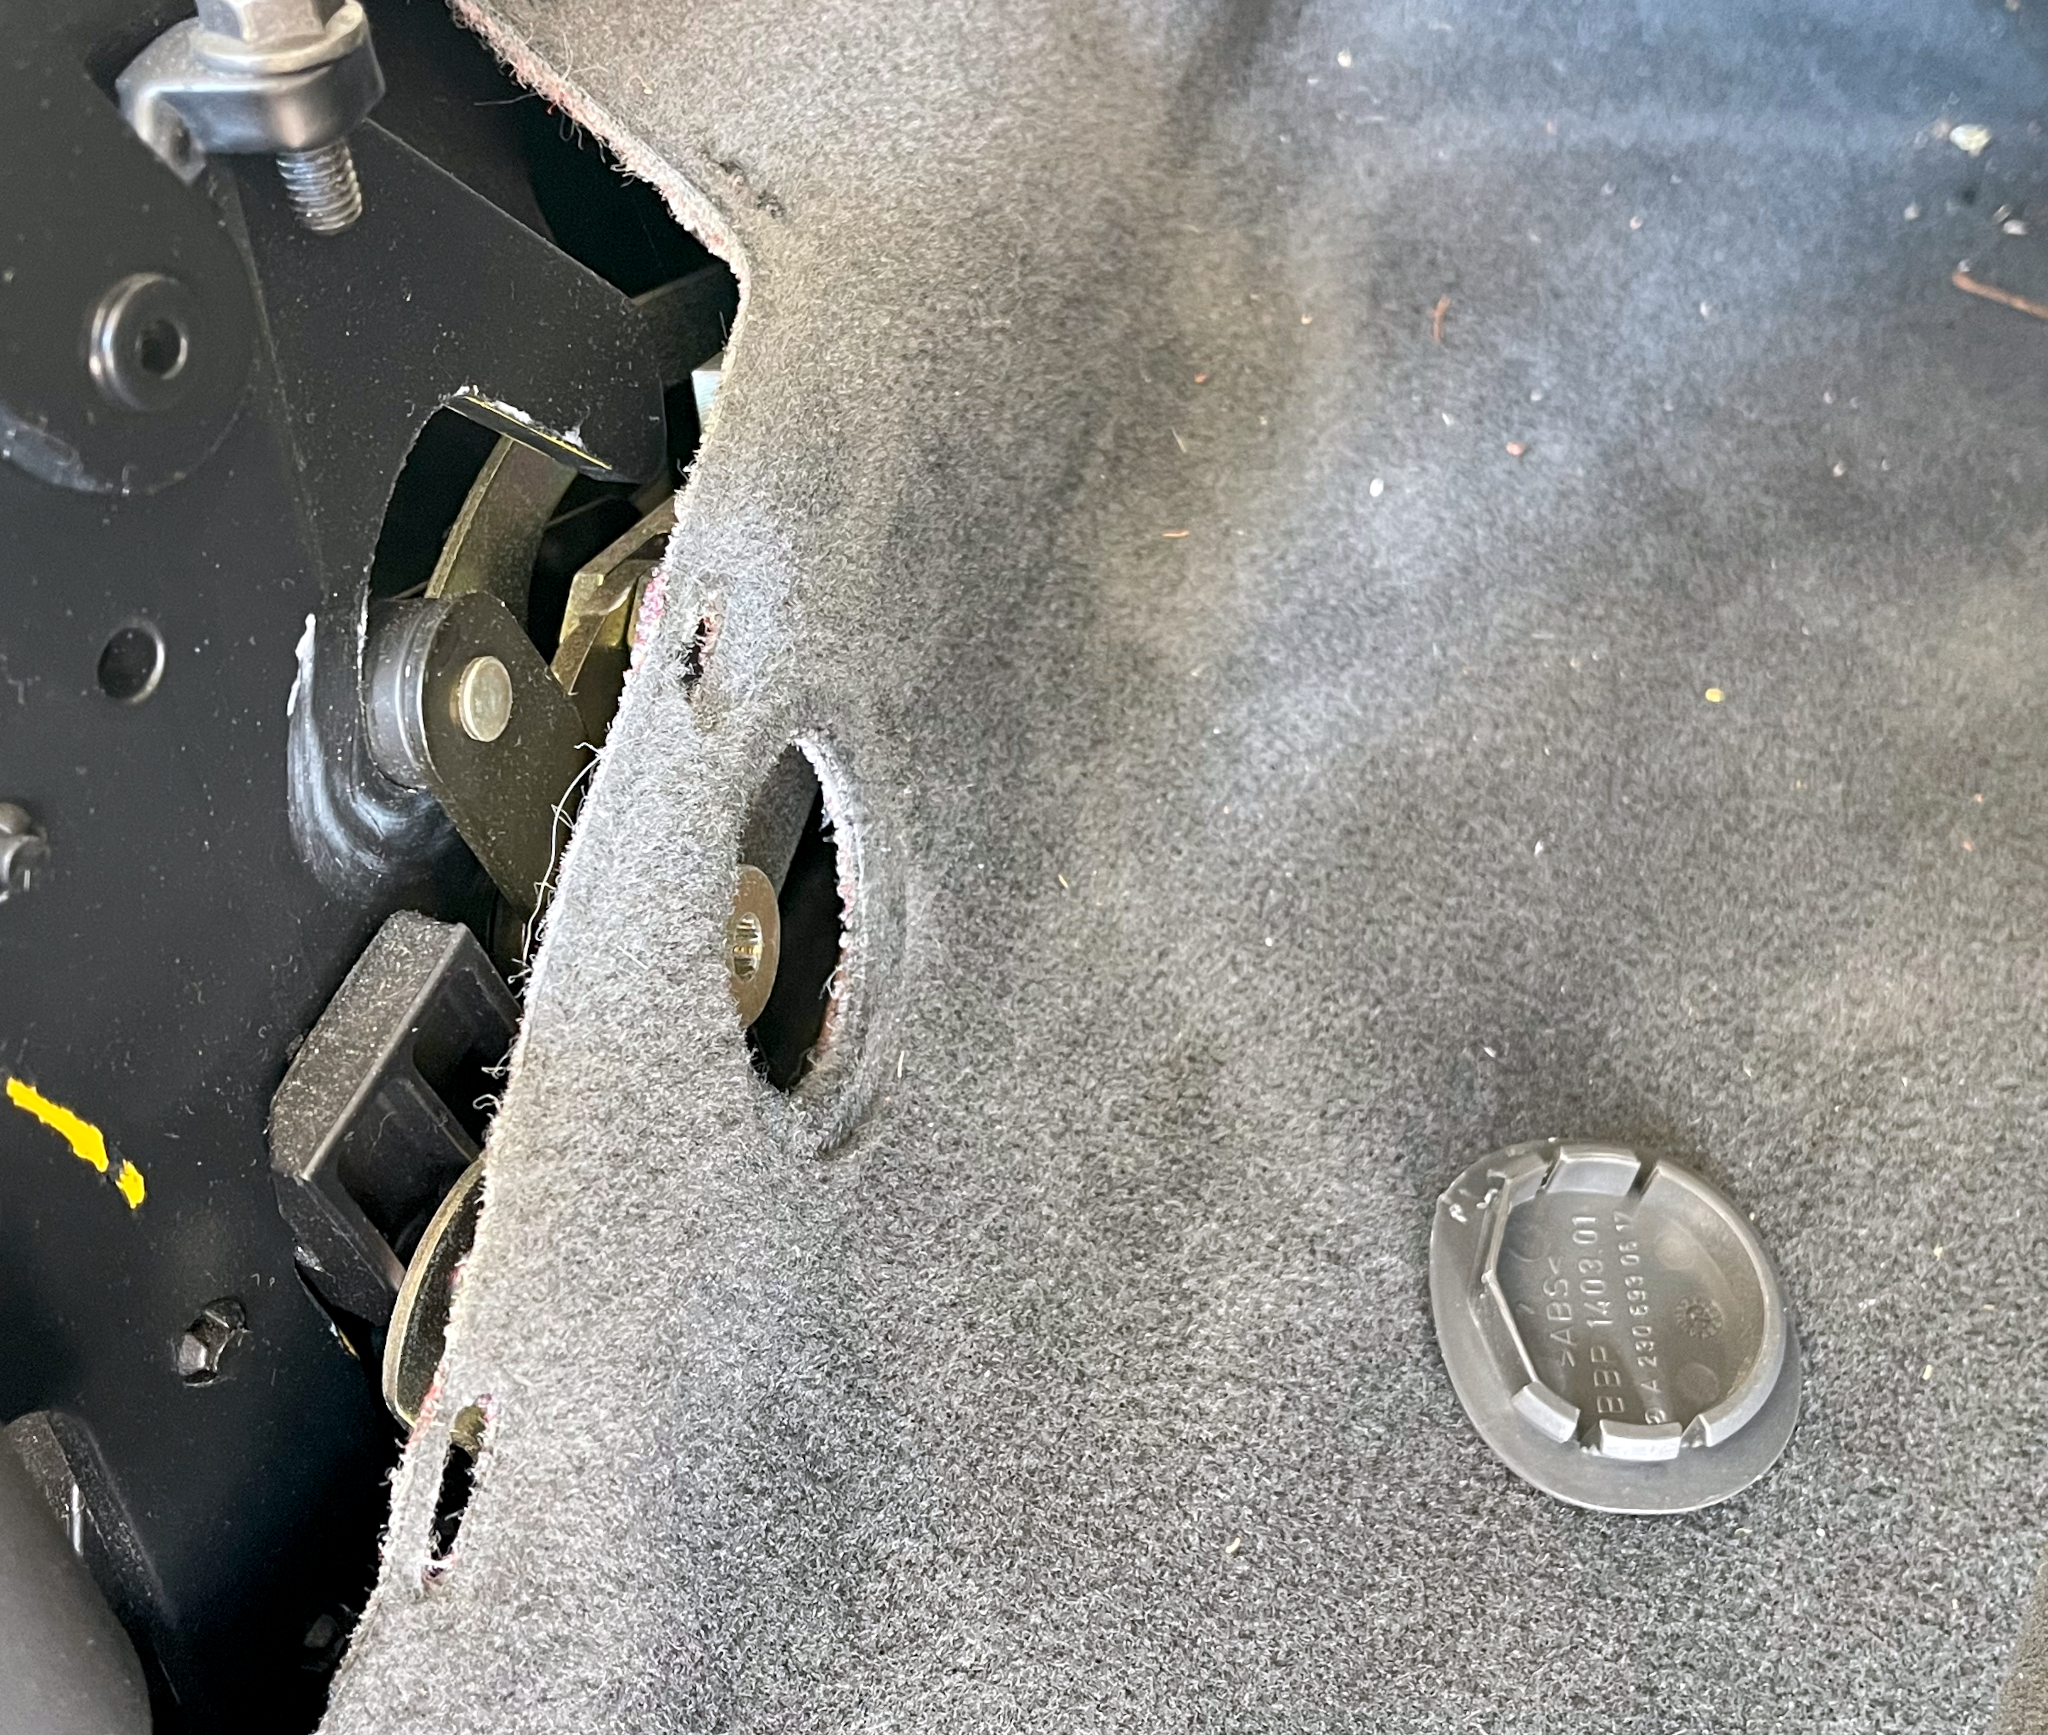
To put it service mode is easy. First, you pop off the little round covers in the trunk where the lid struts connect to the body.
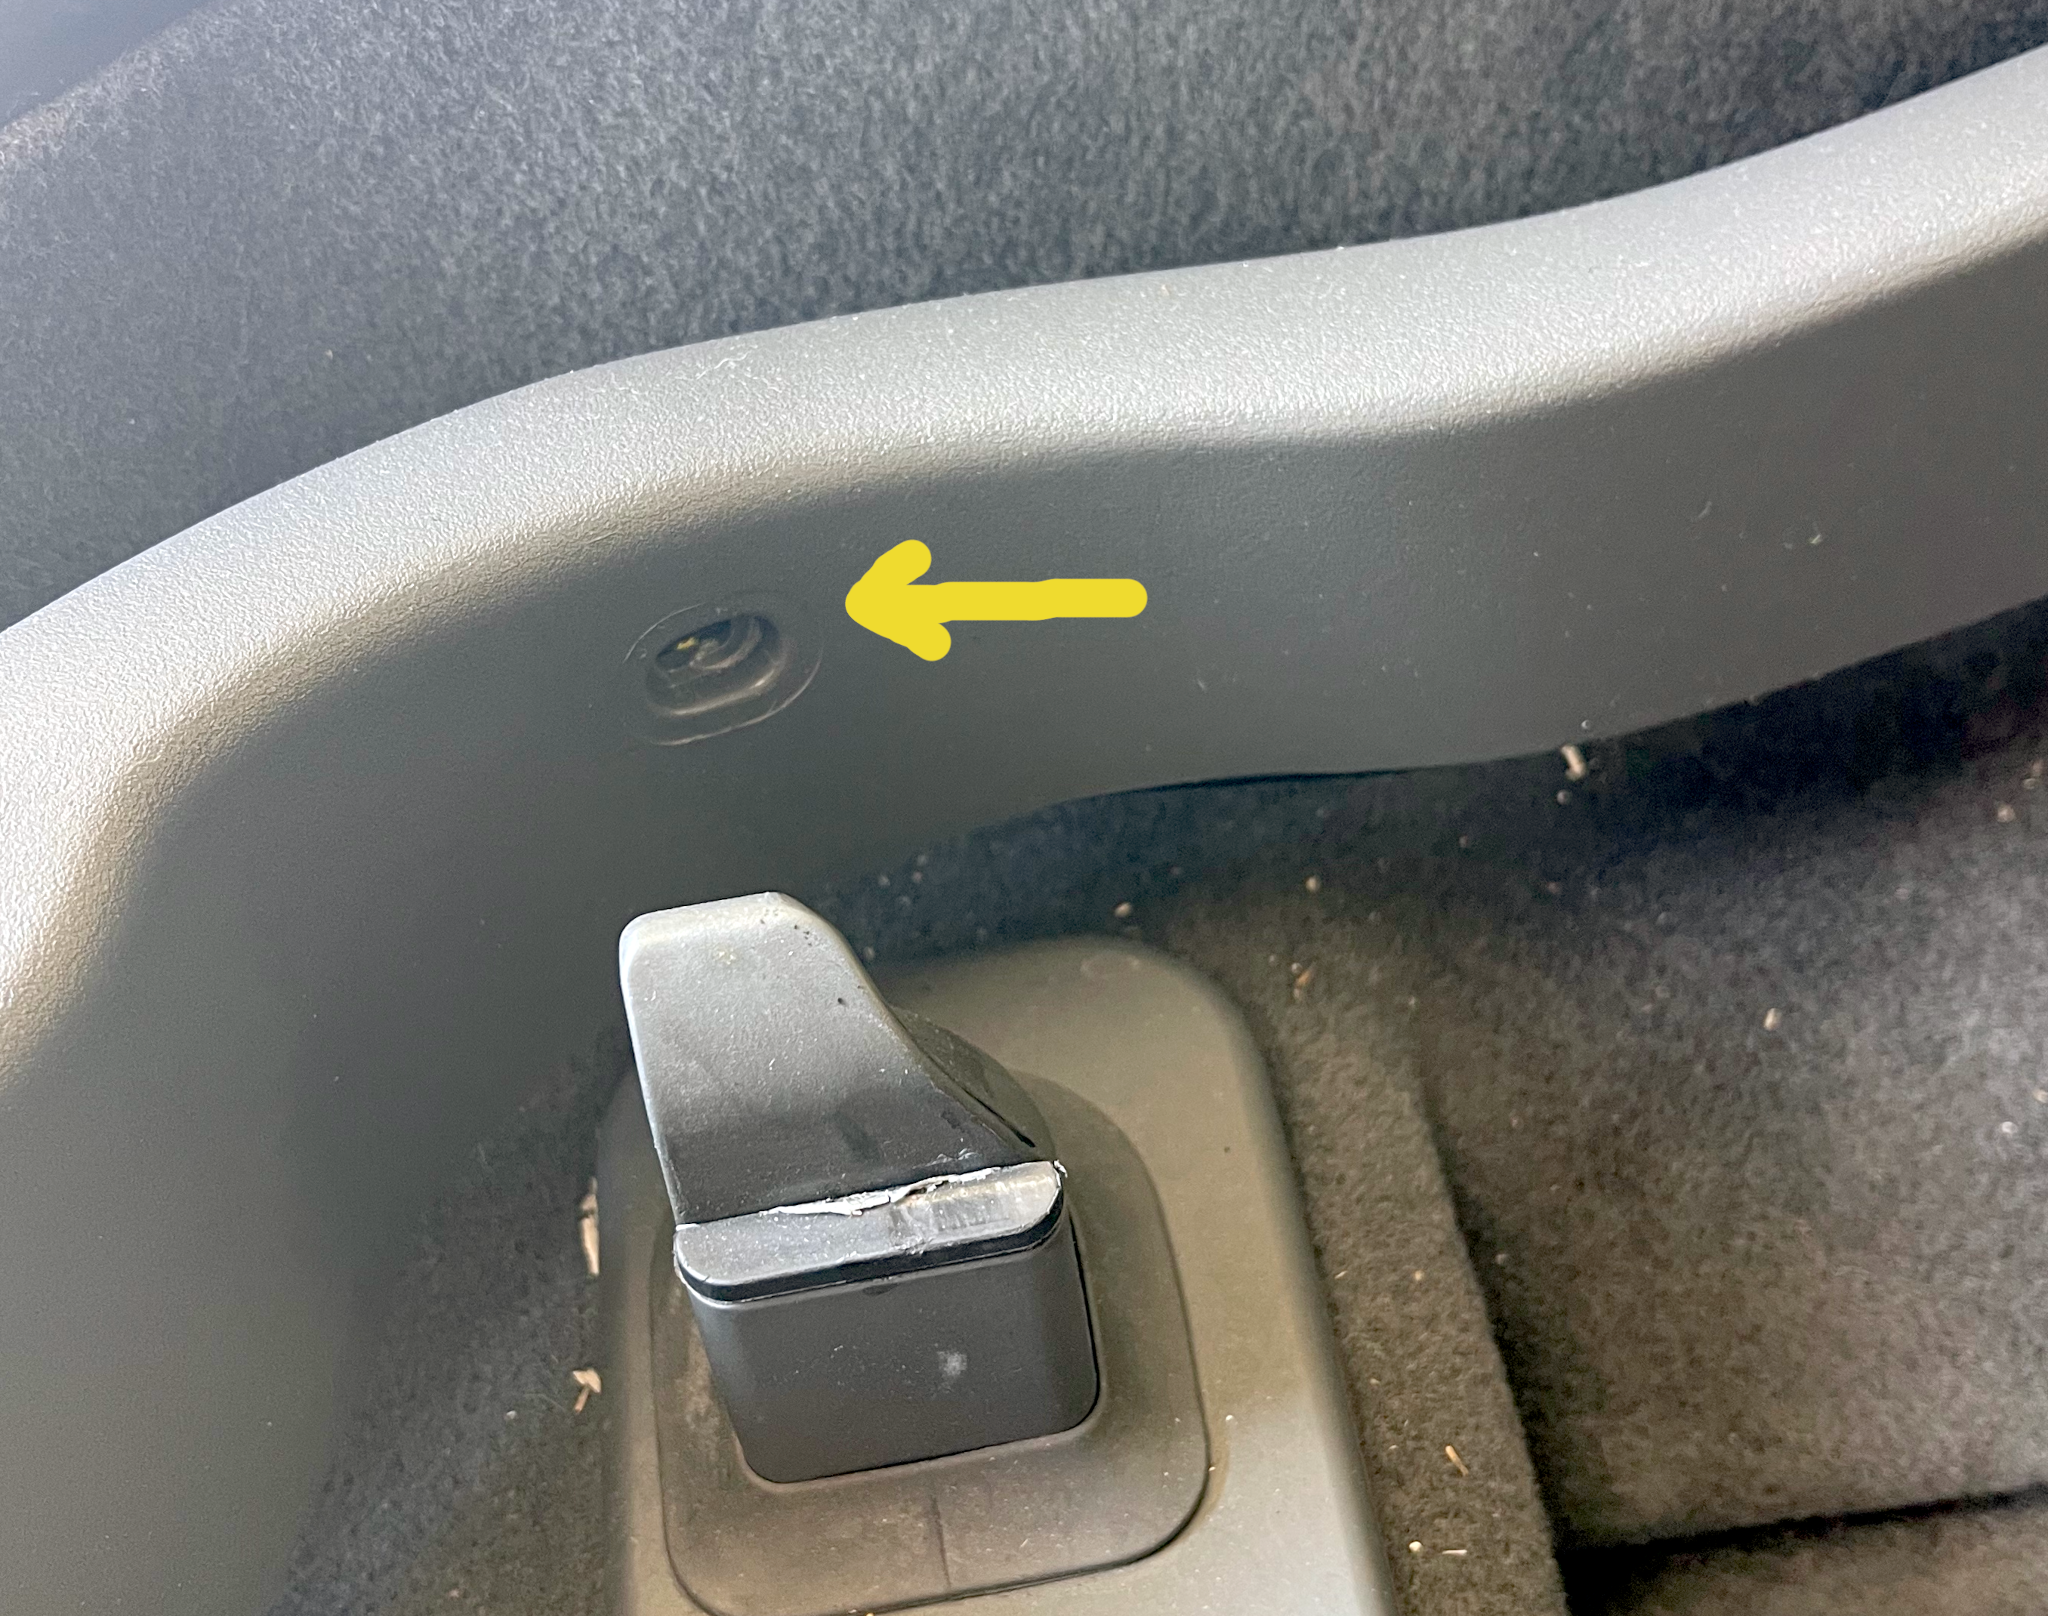
Then you remove two small screws, one on each side, holding the trim to the side of the car.
Finally, you pop up two of the little “square” clips on each side of the trunk latch.
Then you can take an Allen wrench (which should come with the toolkit in your car) and you can insert it to slot you uncovered when you removed the round covers earlier. It only takes about a quarter turn until the strut will separate from the body. Repeat on the other side.
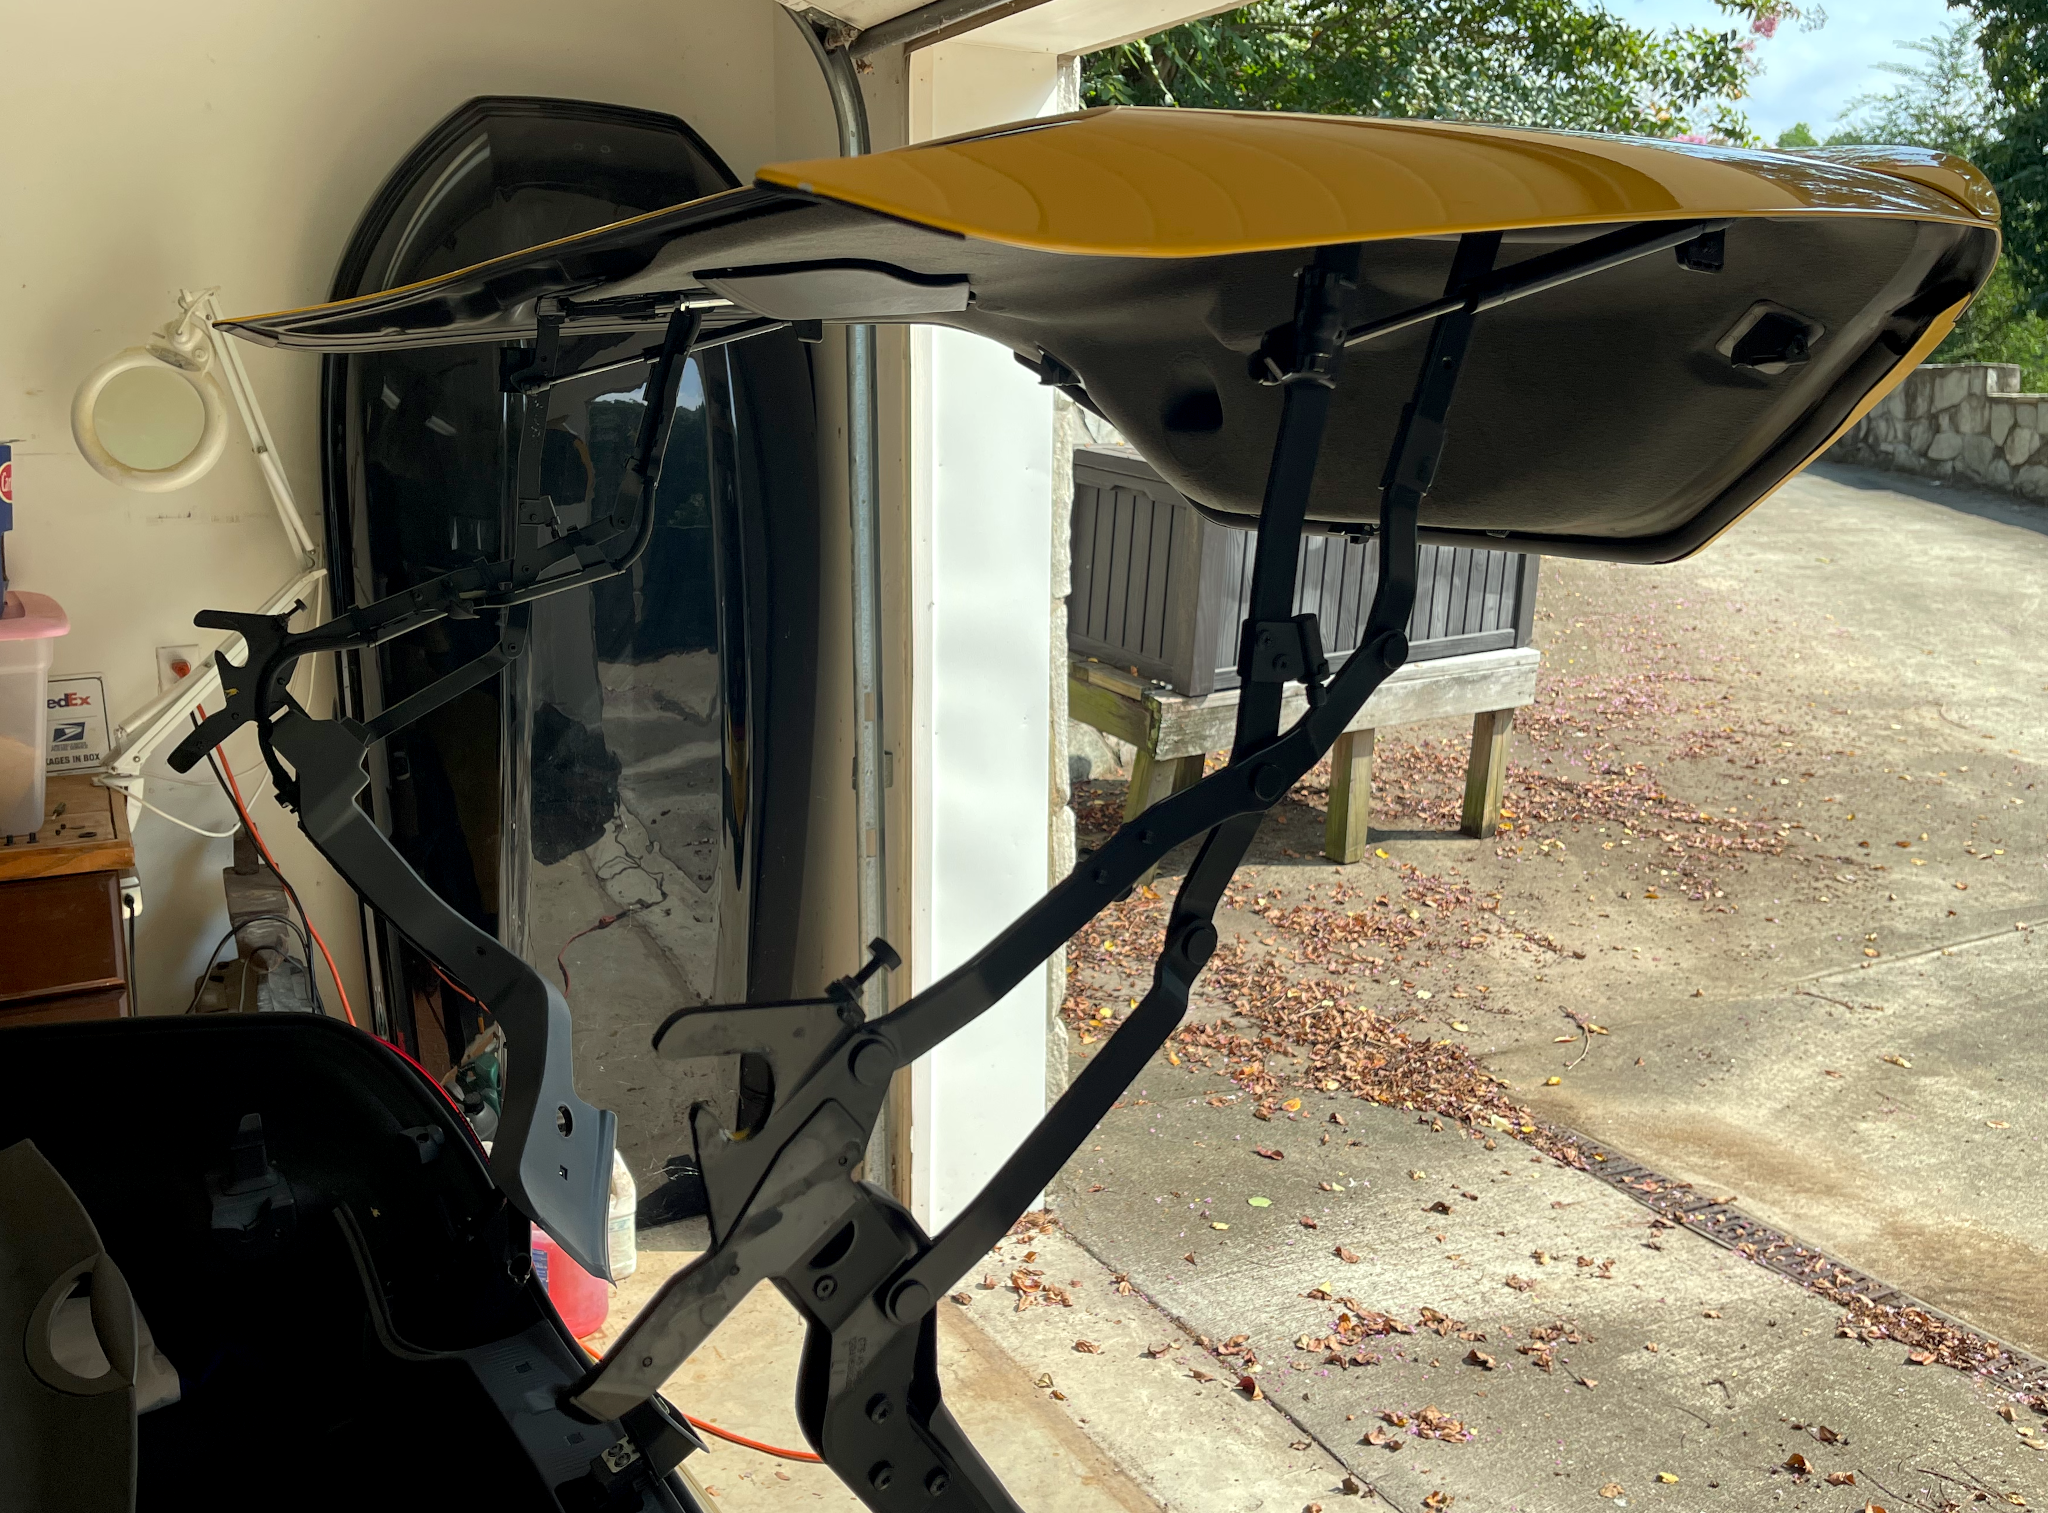
When everything is free you can lift the lid up (easier with two people) and it will stay out of the way while you work on the car. Just be careful not to hit your head.
Oh, before you start working on the BCM be sure to disconnect both batteries. This is very important. Disconnect the consumer battery in the trunk first, then the starter battery in the engine bay, and after the BCM is replaced, connect them back beginning with the starter battery and then the consumer one.
I followed the video’s instructions until I was able to expose the existing BCM. As I mentioned earlier, replacing the BCM is easy at this point, you just need a 10mm and a 13mm socket.
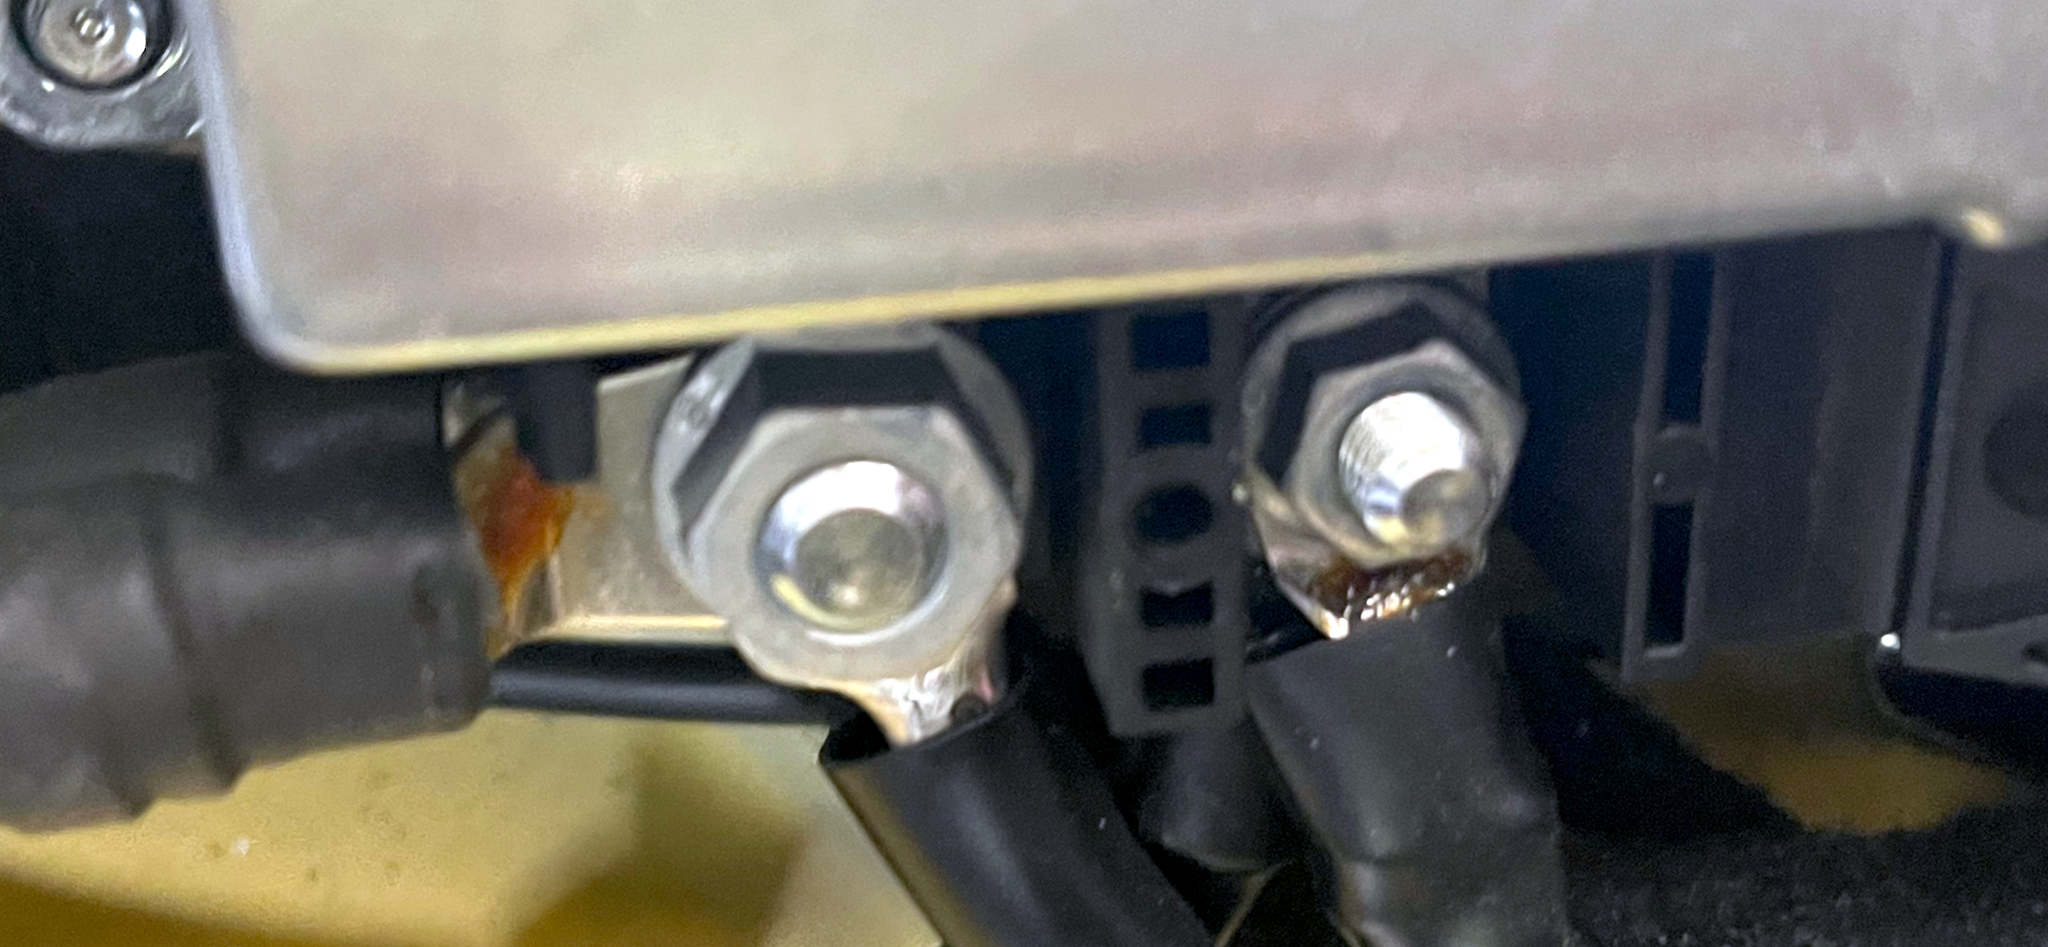
There are five thick wires connected to the lower left side of the unit. I started with the 13mm socket and removed the nut over the left set of wires (three of them) and then the 10mm socket to remove the nut over the other set of wires (two of those). I then removed the four screws that hold the unit to the body. All that was left was to pull out the big, black connector block on the lower right.
Note: One thing that tickled me about this whole process was confirming that the car was painted yellow at the factory. I didn’t doubt it, but it would be rare for someone who changed the color to paint all these surfaces that are hidden by the trunk carpet.
It is easy to remember which wires go where. The three that go on the post with the 13mm nut have larger holes on their terminals and won’t fit on the other post.
It is also cool that for those three wires the terminal connectors are offset on two. This means you can sandwich the “flat” terminal between the two offset ones so you don’t stress anything when you tighten the nut back down. I think it is crazy a company like Mercedes that would do that would also forget to just put a big fuse inline with the BCM to prevent fires (sigh).
Anyway, installing the new BCM was easy - just do the steps in reverse. Insert the big blocky connector, screw down the four 10mm nuts to hold the unit to the car body (being careful not to pinch any wires underneath it), and then replace the five thick wires.
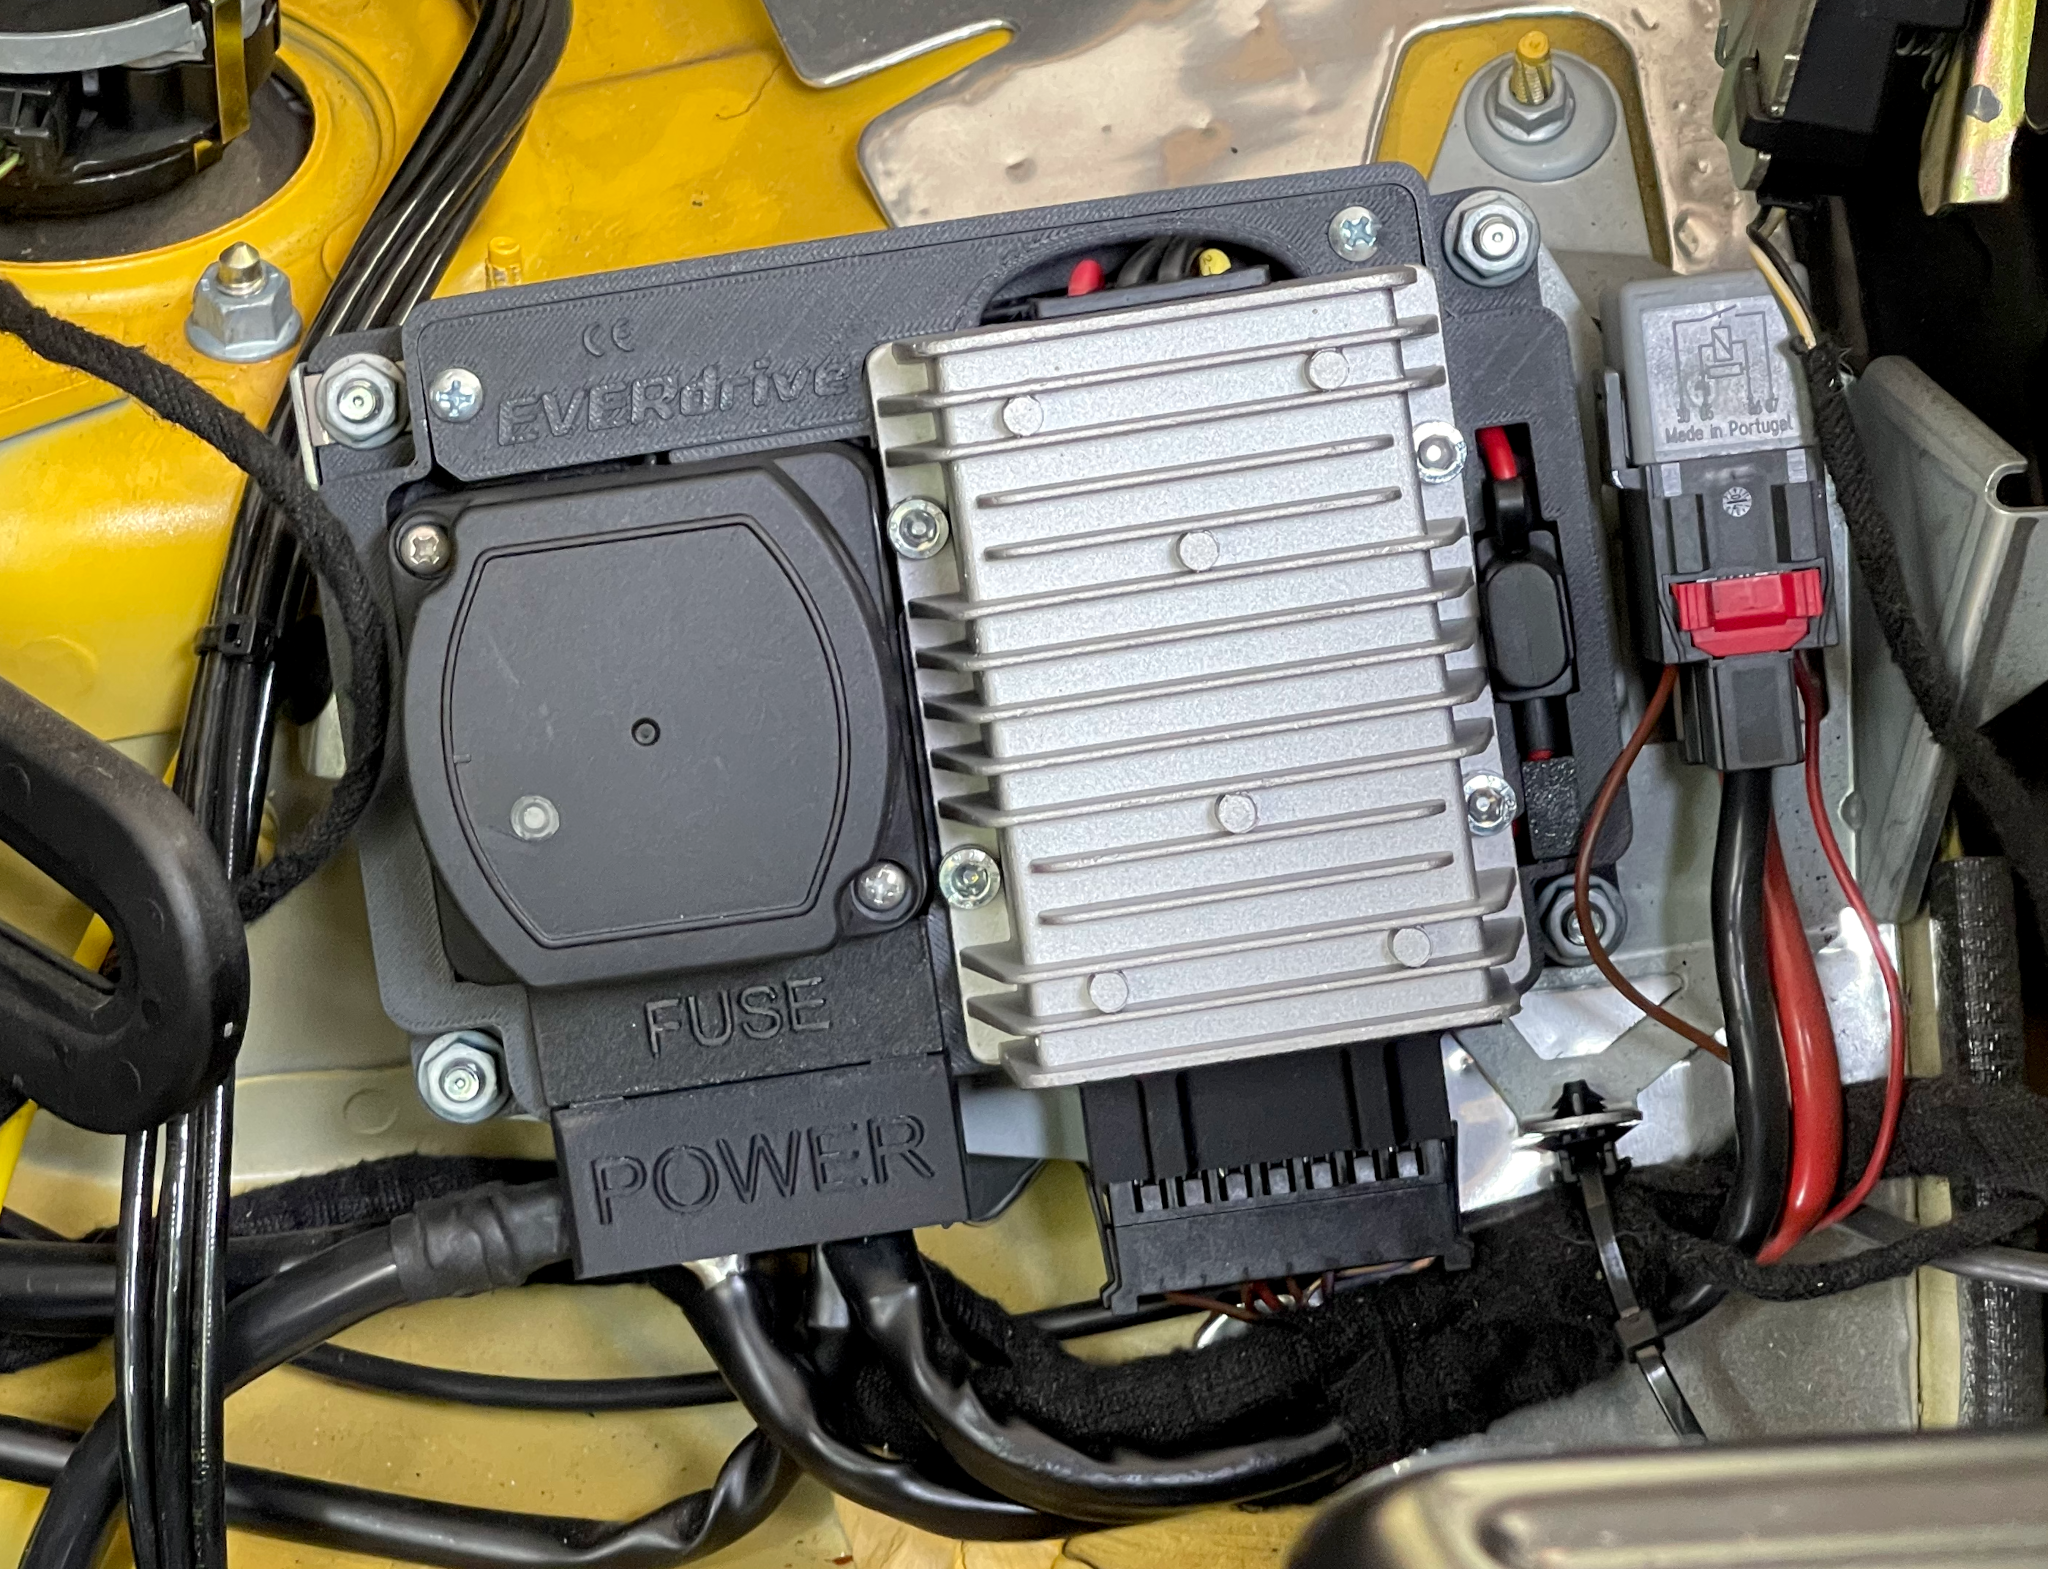
Before I went any further, I wanted to make sure everything was okay, so I started up the car. Unfortunately I got the “red battery of death”.
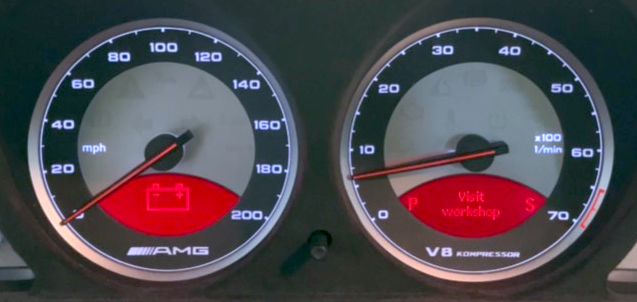
(sigh)
After searching online to see if anyone else had similar issues with their Everdrive unit (none did) I sent an email to Richard. This was on a Sunday about 2pm my time and more like 8pm his time. To my surprise he immediately wrote back with his WhatsApp number so we could diagnose it in realtime. He immediately noticed that when I inserted the big multi-wire connector I didn’t seat it all the way.
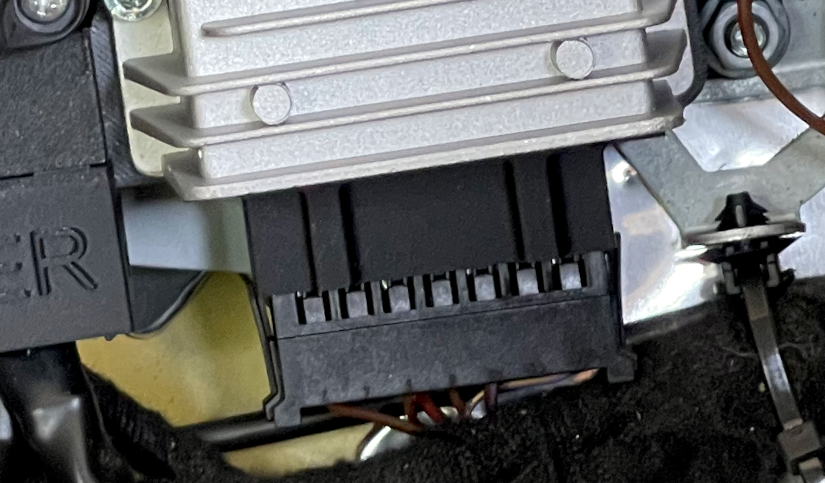
Even after I corrected that, the car was really unhappy. I mean, possessed by Satan unhappy. The display kept showing the red battery icon and a number of other messages, and the ABC would raise the car and then a few seconds later lower it. I didn’t leave the car running all that long but it was still weird.
I replaced the unit with the original BCM and the issues went away.
Richard apologized profusely and offered to send out a replacement immediately, saying that this would be the first of all the units he’s shipped to be defective. I figured I’d done something to the unit by not seating the connector all the way, but he thinks that shouldn’t have caused any issues. I’m not sure I believe him as I’m certain my own incompetence played a role.
It turns out that I needed to be in Amsterdam for a conference, so I told him instead of shipping the replacement to the US, where it would sit in customs for some unknown period of time, why not just ship it to my hotel? I would bring the unit I had with me and I could ship it to him “in country” and not have to deal with customs. In continuing to exceed my expectations, he sent me a bar code which meant that all I needed to do was to find a PostNL office. They would scan the code and generate a pre-paid shipping label.
I got to AMS on a Monday, walked down to the Central Station where there was a PostNL kiosk, and the non-working unit was on its way back to Richard. My replacement showed up at the hotel on Tuesday.
I also got more stroopwafles. (grin)
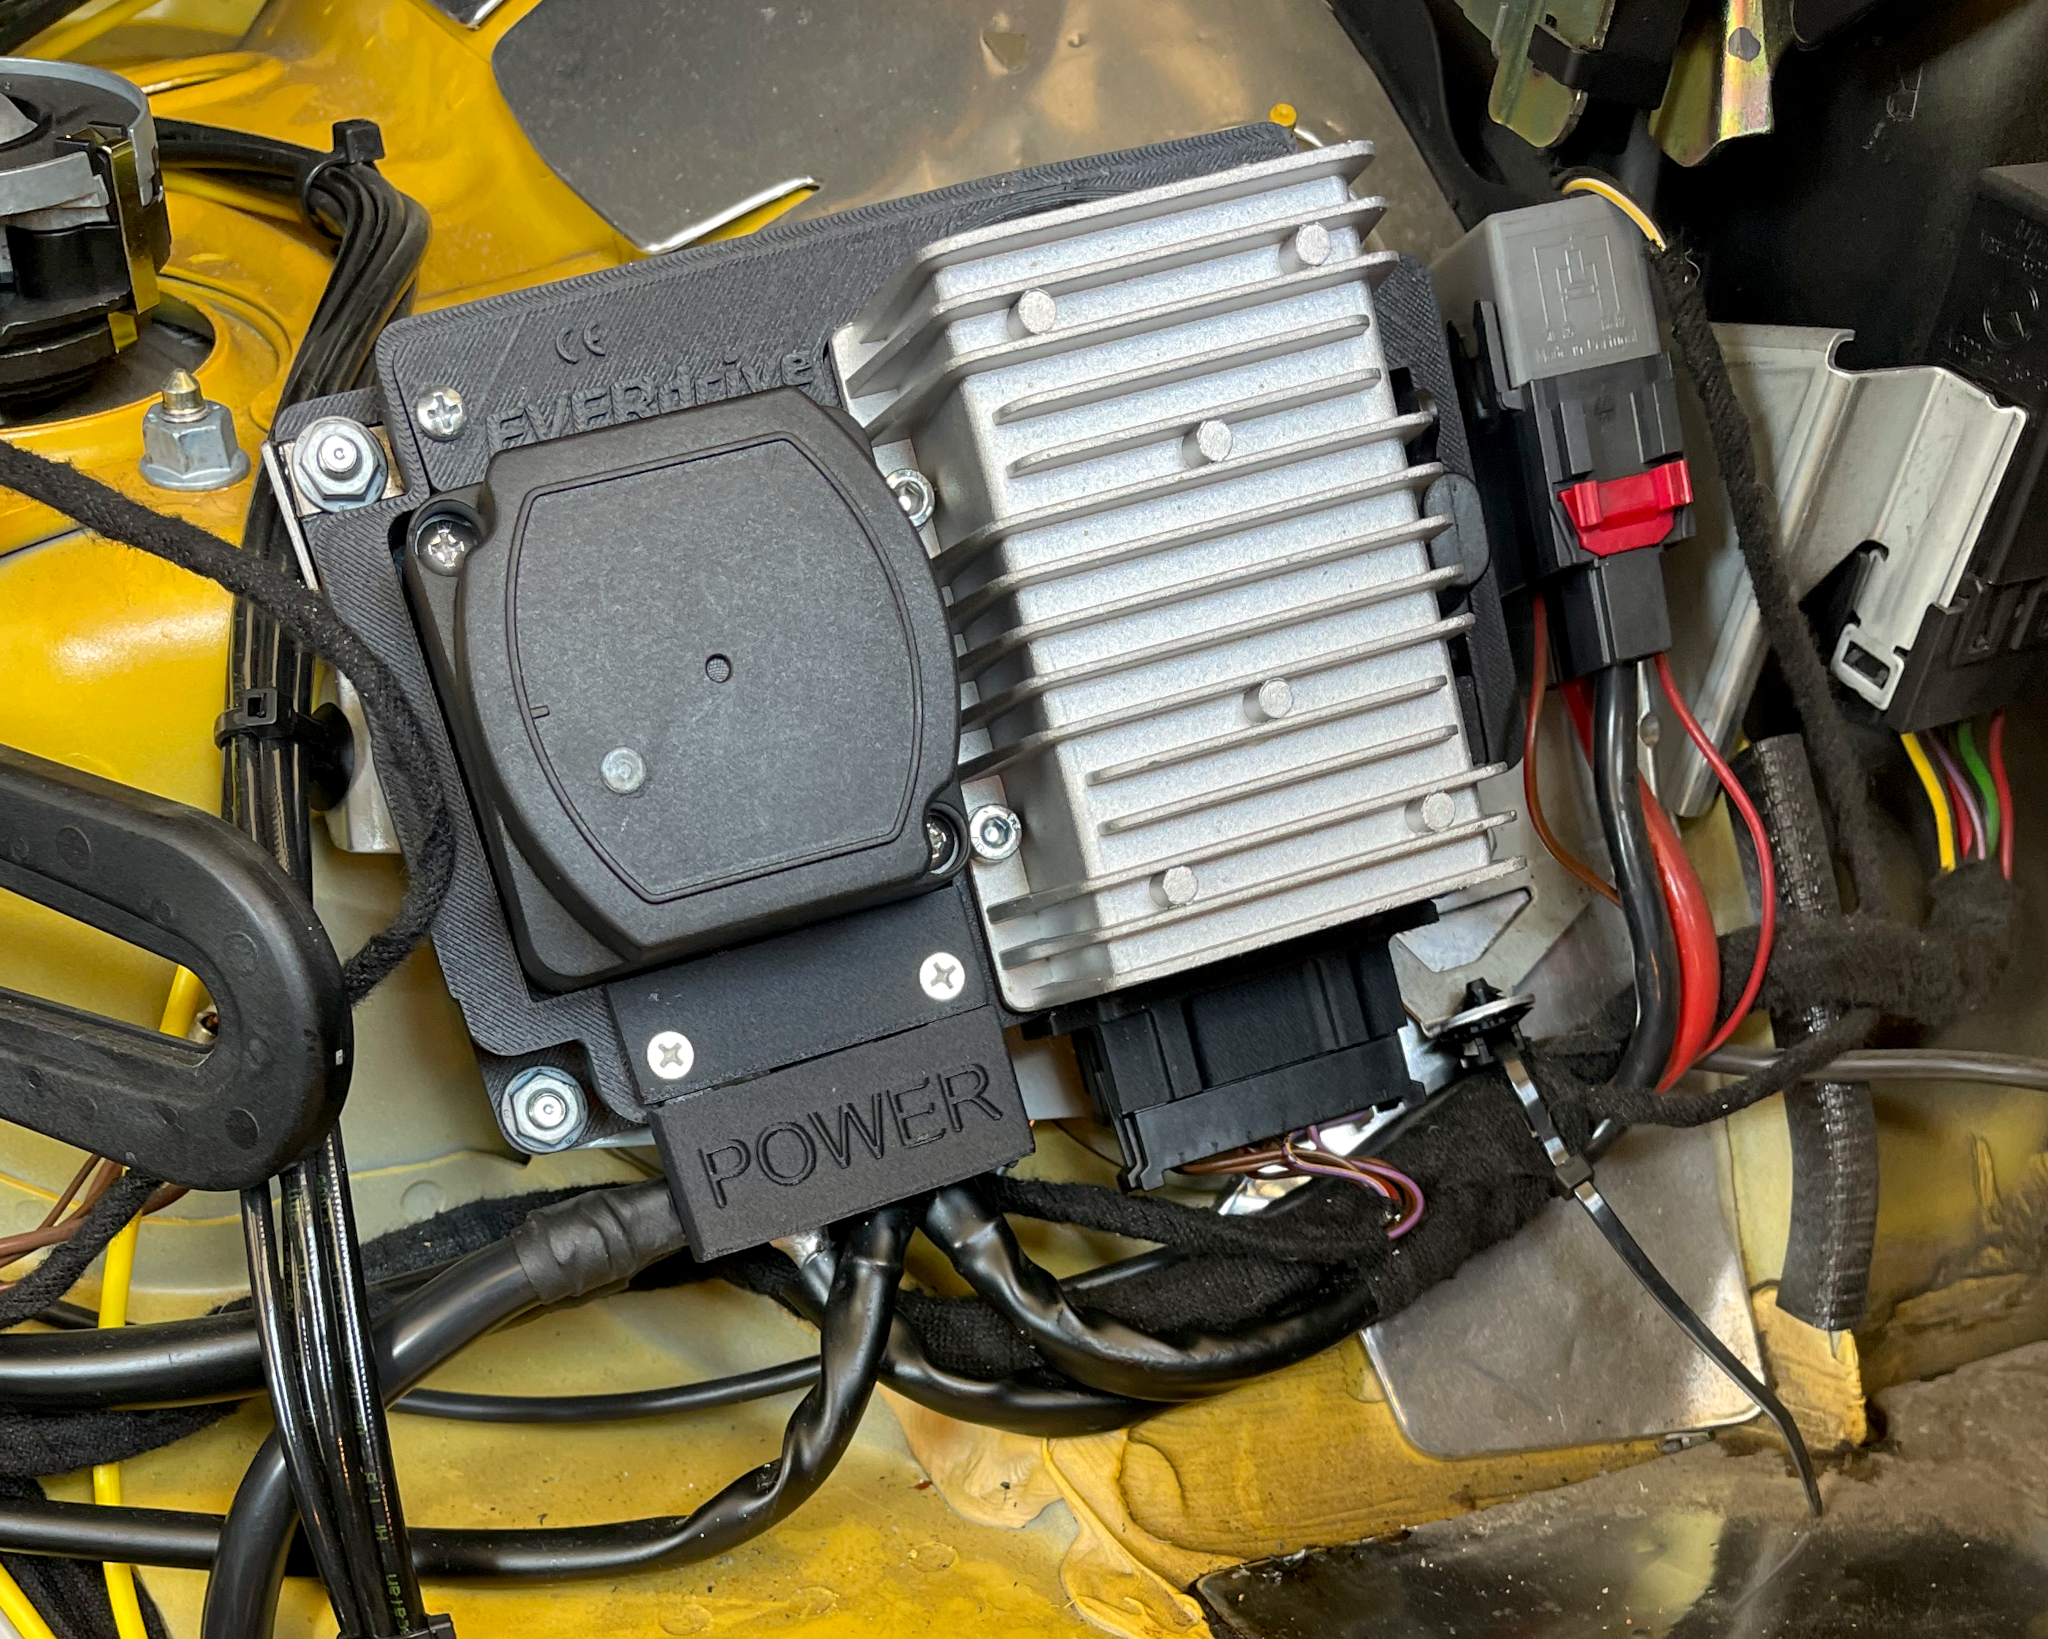
I was back to the US late Sunday night, so early Monday morning I went and installed the new BCM, being sure to firmly set the block connector so it was flush with the unit.
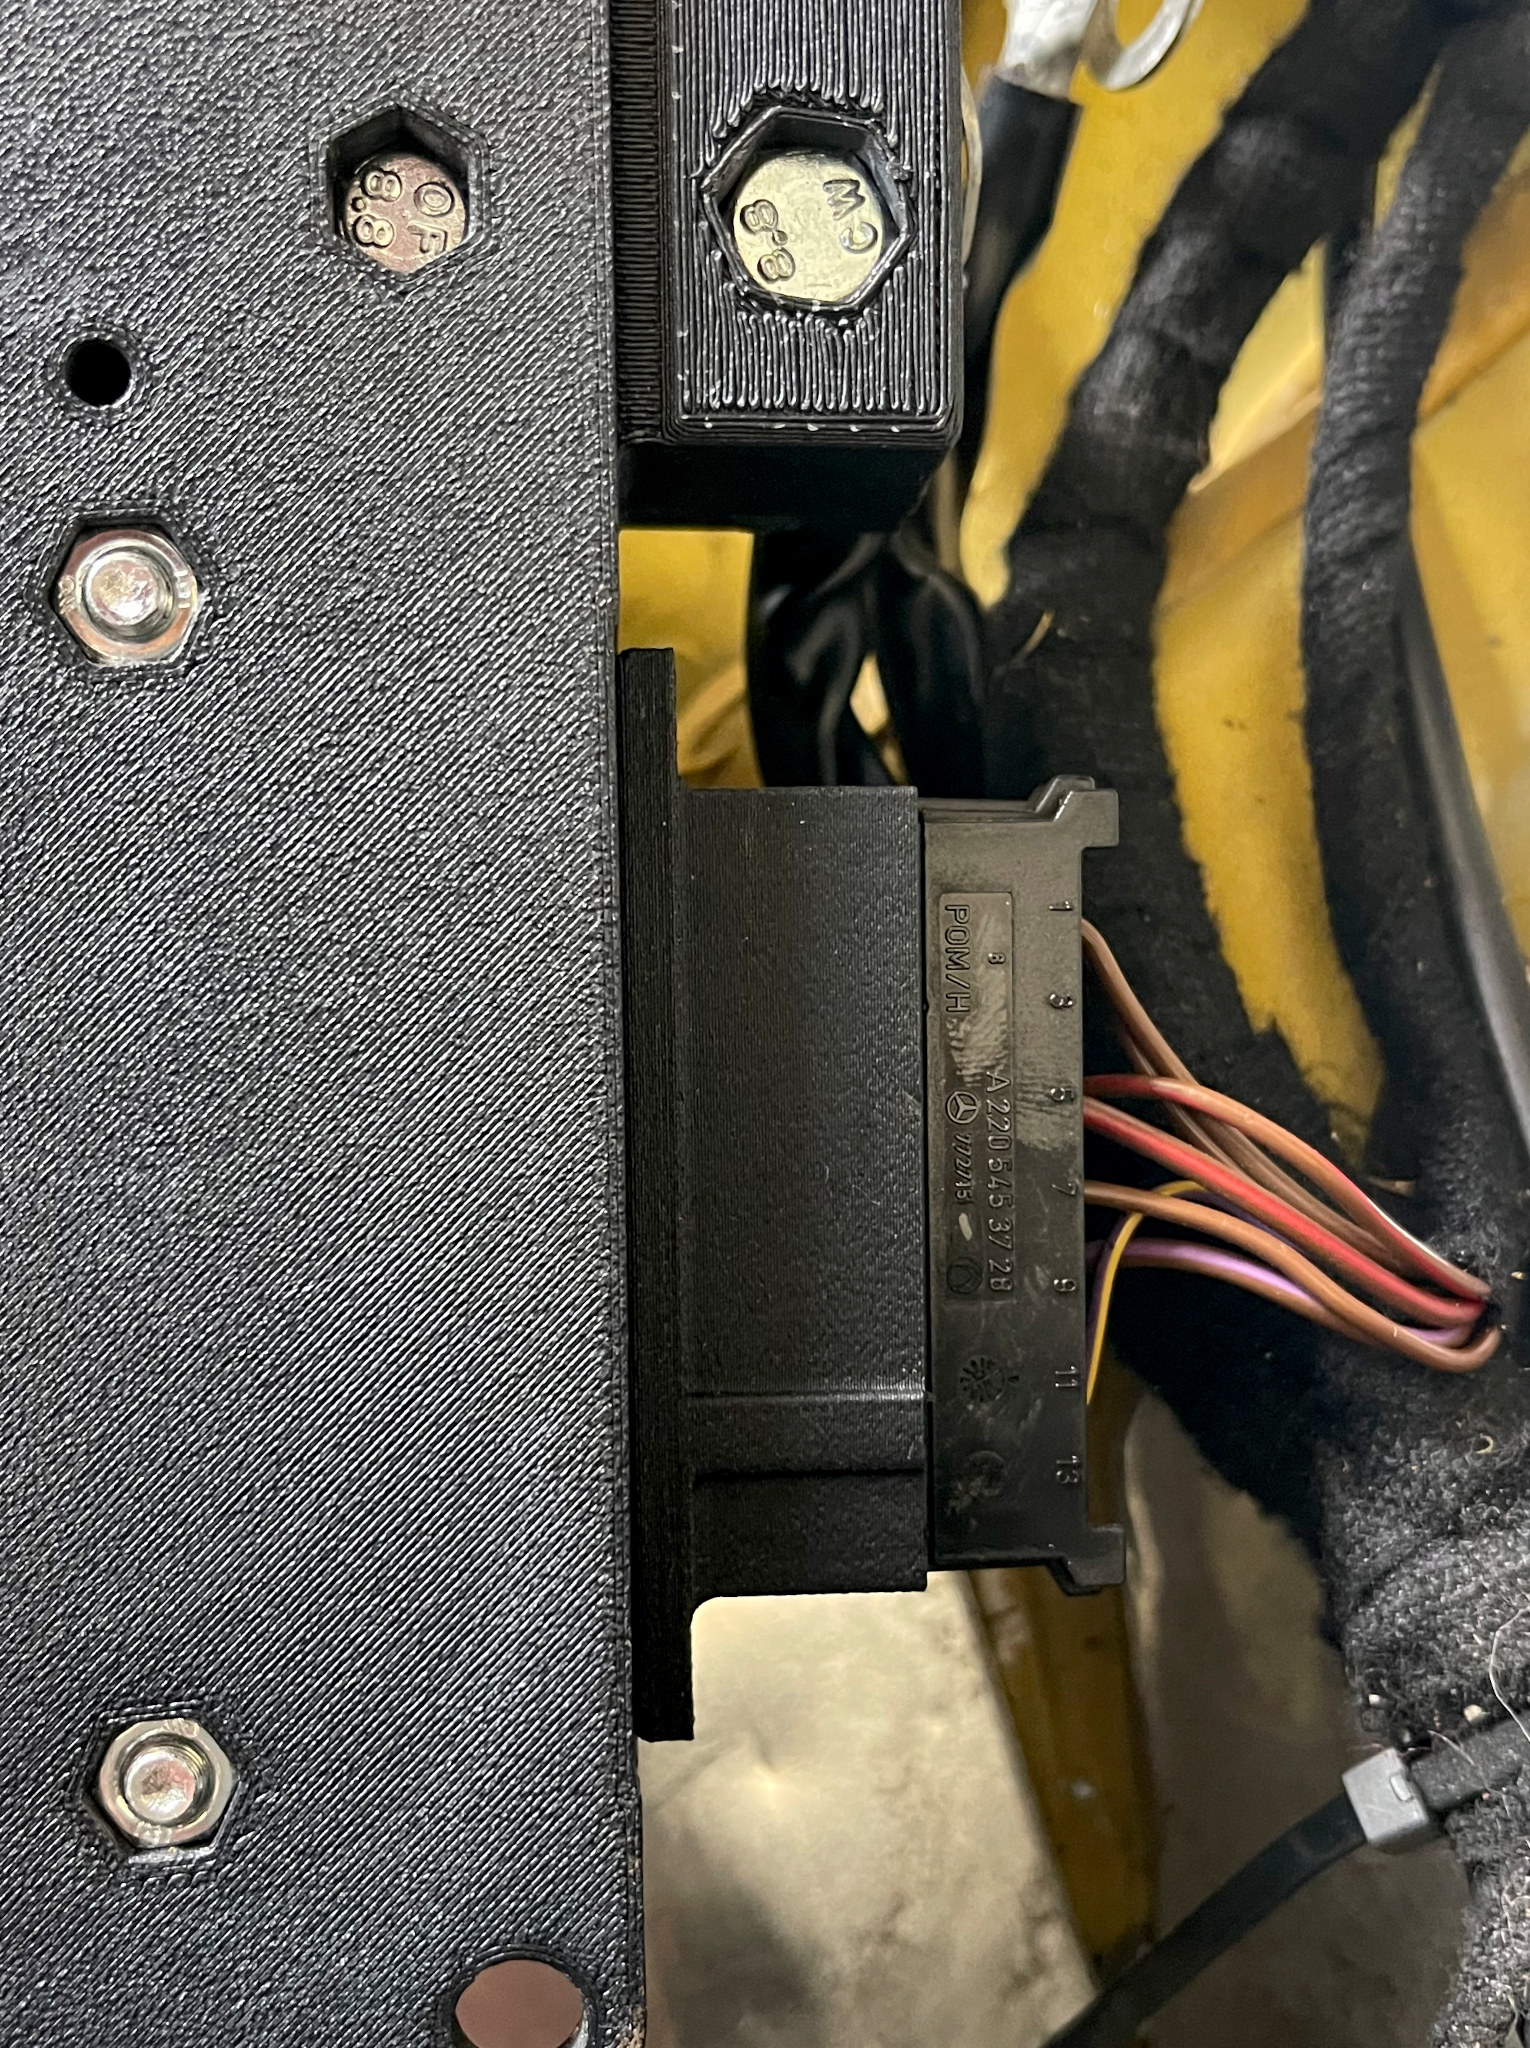
No issues. Started up the car and everything was fine.
It wasn’t until this morning that I was able to put everything back in place in the trunk, but once it was done I did a 20 mile drive and everything worked great.
I am also eager to see if this fixes the vampire drain on the consumer battery. Richard writes “my unit is the only BCM replacement without parasitic drain because it uses the CAN signal to wake up the module and this is really a great addition.” This will get rid of the need to keep it on the CTEK charger when not in use.
The unit also comes with a remote control to temporarily bridge the consumer battery to the starter battery, kind of like a built-in jump starter. When I first read about it I wasn’t sure I would ever use it, but I did get stuck once with a drained starter battery and it would have come in handy.
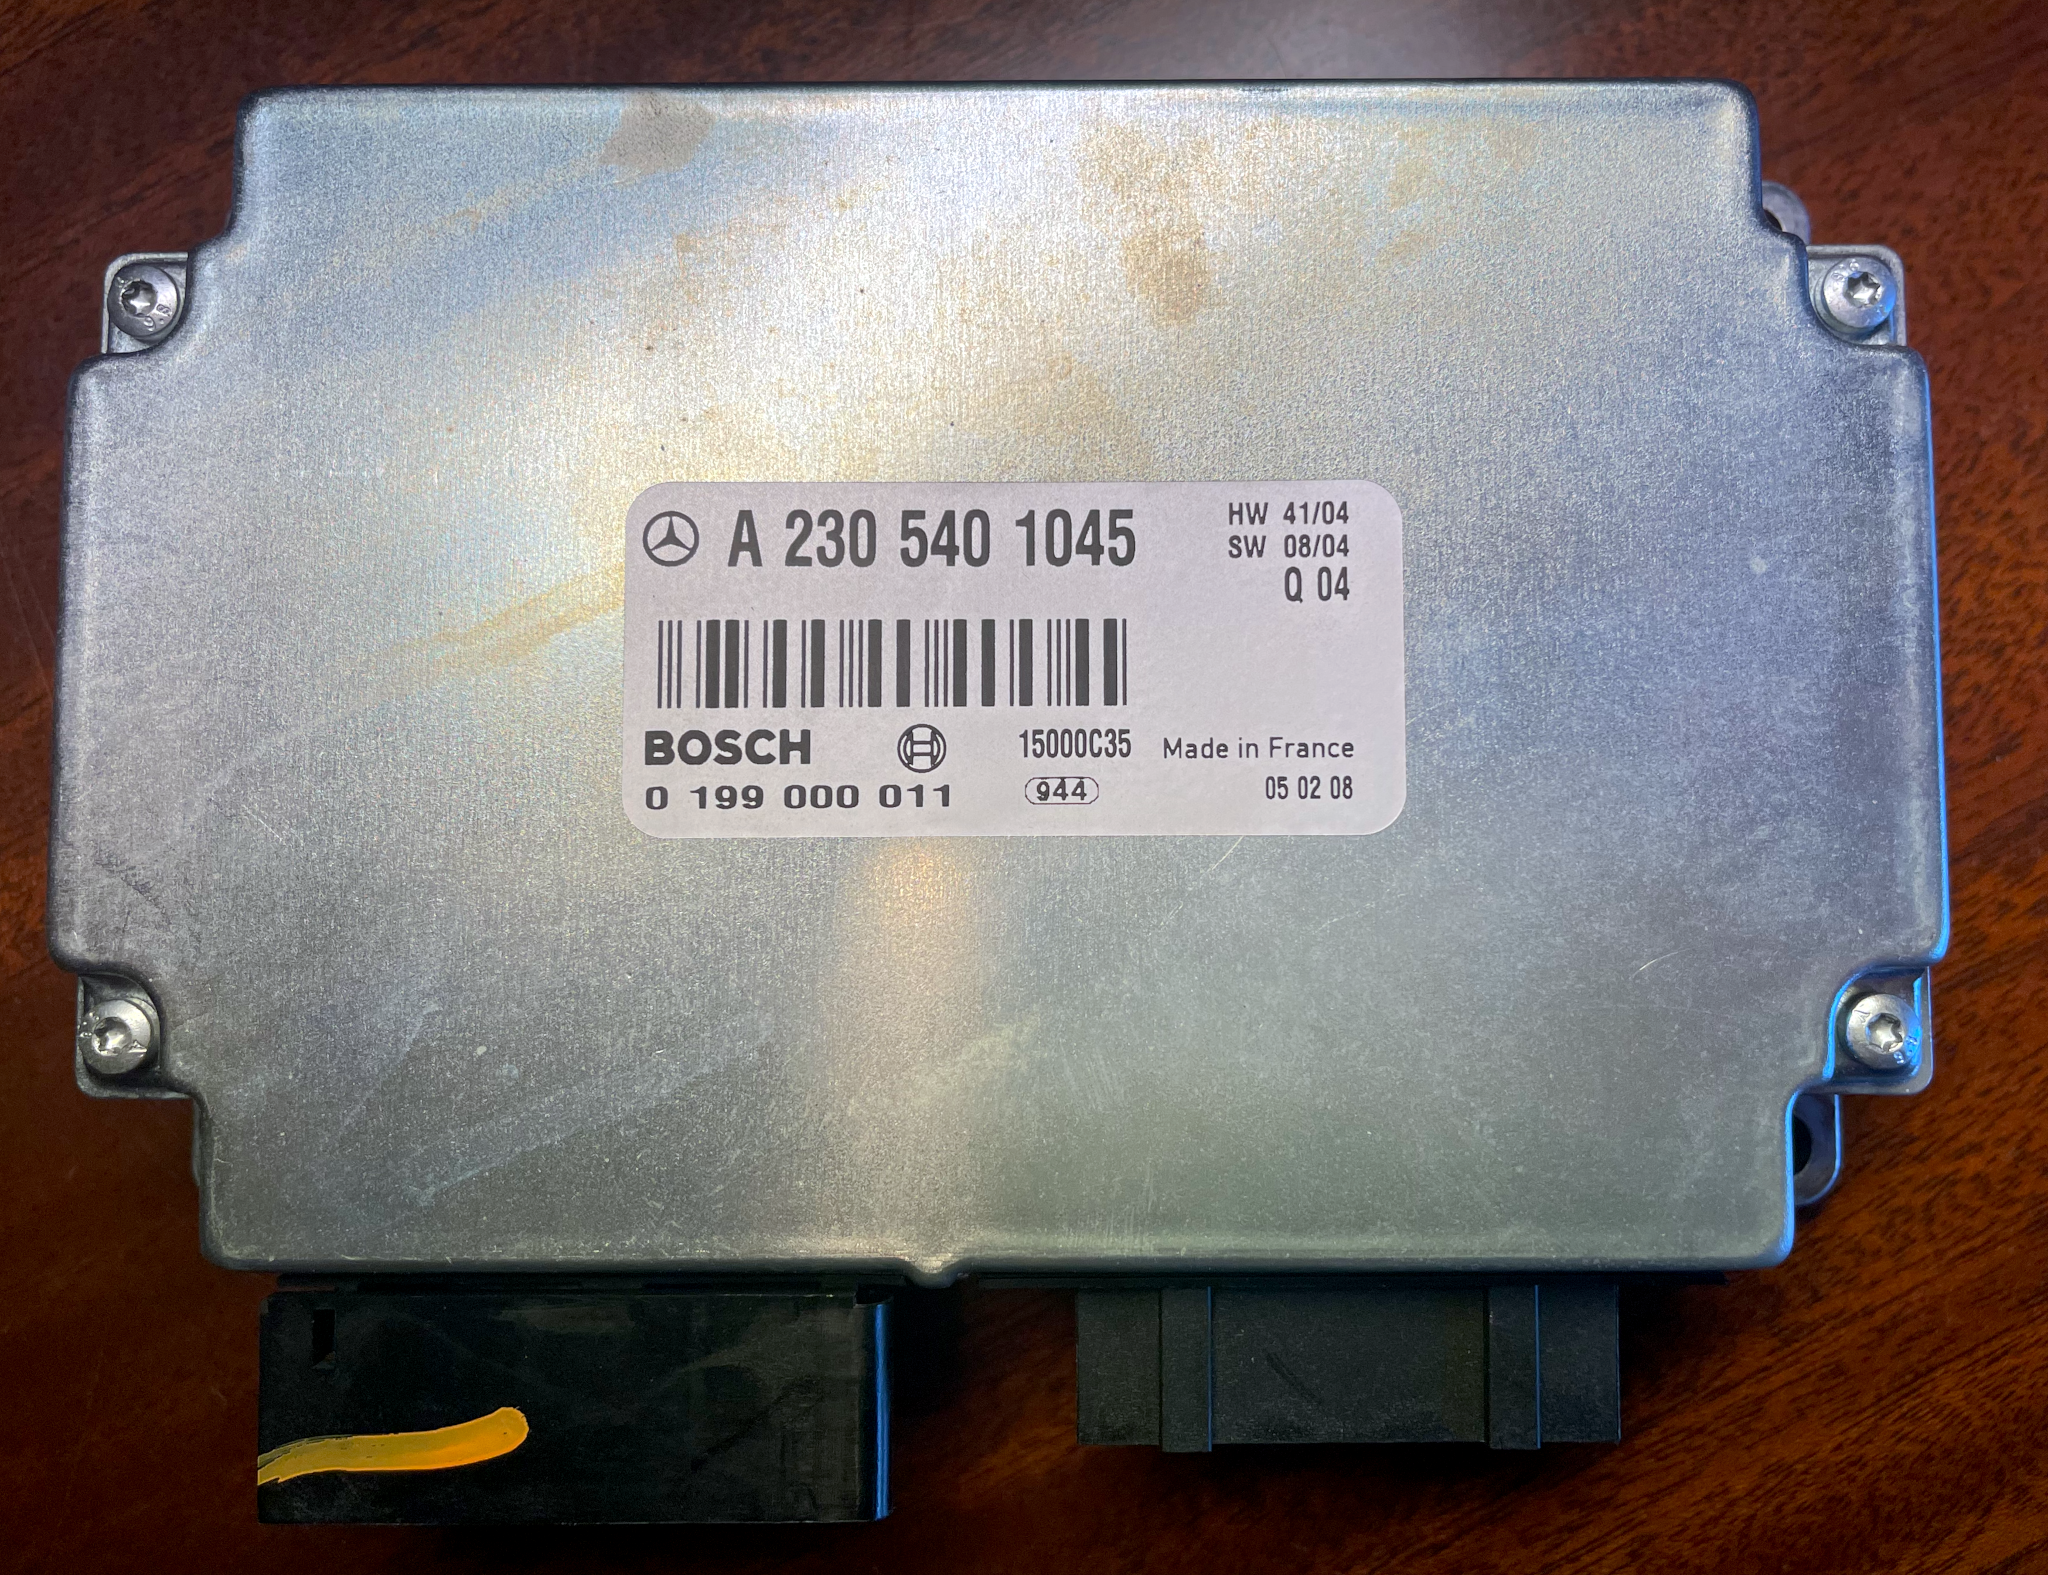
My OEM BCM is one that has the “catch fire” issue.
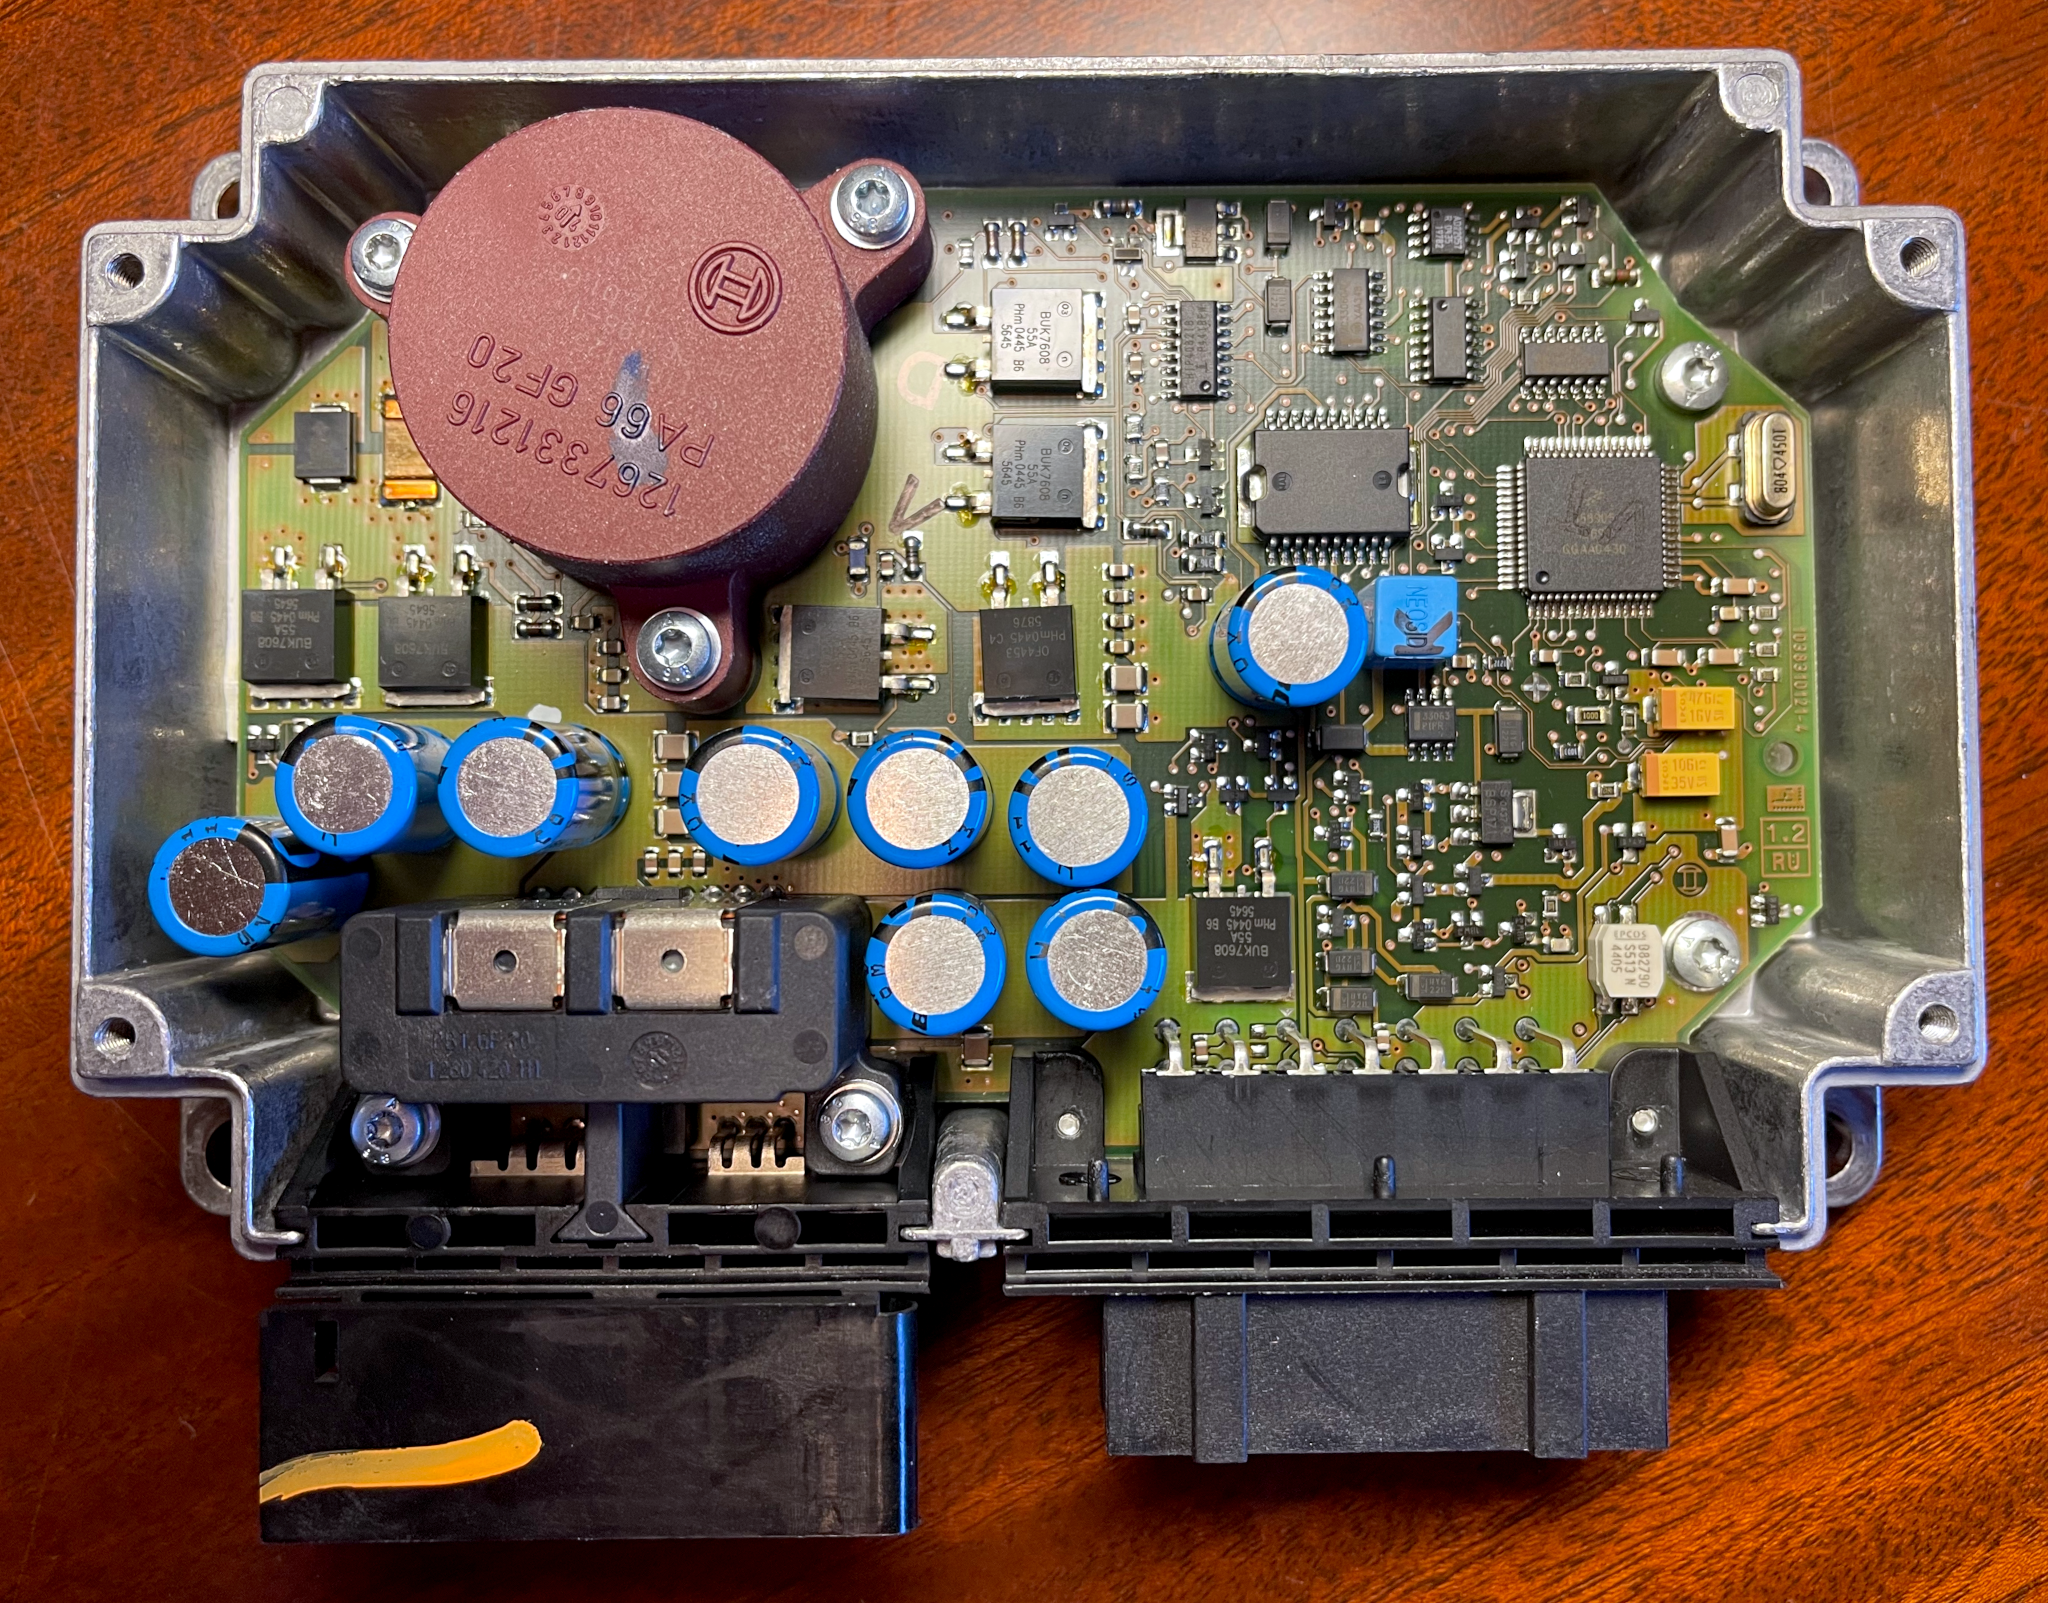
Since I was curious I did open it up, but it looks fine.
I plan to hold on to it as they seem to be impossible to get, and when you do find them they are quite expensive. I doubt I’ll ever need to deal with it again, however.
To summarize, while this looks a little involved, it is not too complicated to replace the Battery Control Module. Many thanks to the folks at BenzWorld who put me on this path, and to the YouTube creators who made it possible to get to the unit without breaking anything.
Extra thanks to Richard at Everdrive for the amazing customer service. While I hope not to have any more issues with the car in the near future, if I ever need another one of his products I won’t hesitate to order.